Deploy microservices
for 🛠️ System Administrator
DIDroom Microservices are the technological core of the solution: those components offer cryptographic functions as well as transport protocols. The microservices are completely isolated from the Dashboard, meaning that:
- The code is hosted in a separated repo
- The microservices can run independently from the Dashboard
- Each microservice has its own secret keys and DID to identify them: those are generated by the microservice at its first provisioning
- The Credential Issuer and Authorization Server microservices, contain the custom code you defined in the respective templates
Preparation
Register a domain name, like myapp.com and ideally register 3 subdomains as:
- issuer.myapp.com
- authz.myapp.com
- rp.myapp.com
Setup a linux server, configure TLS and make sure the server is resolved at: https://myapp.com/ or ideally to the 3 subdomains as above. You'll need to setup a reverse proxy (more about it later).
Make sure you have all the commands installed, type:
sudo apt install make wget jq git -yProvision and download the Microservices
- Go to https://dashboard.didroom.com and create at least an Issuance Flow. During the creation, you will have to create multiple objects, such as templates and setup microservices.
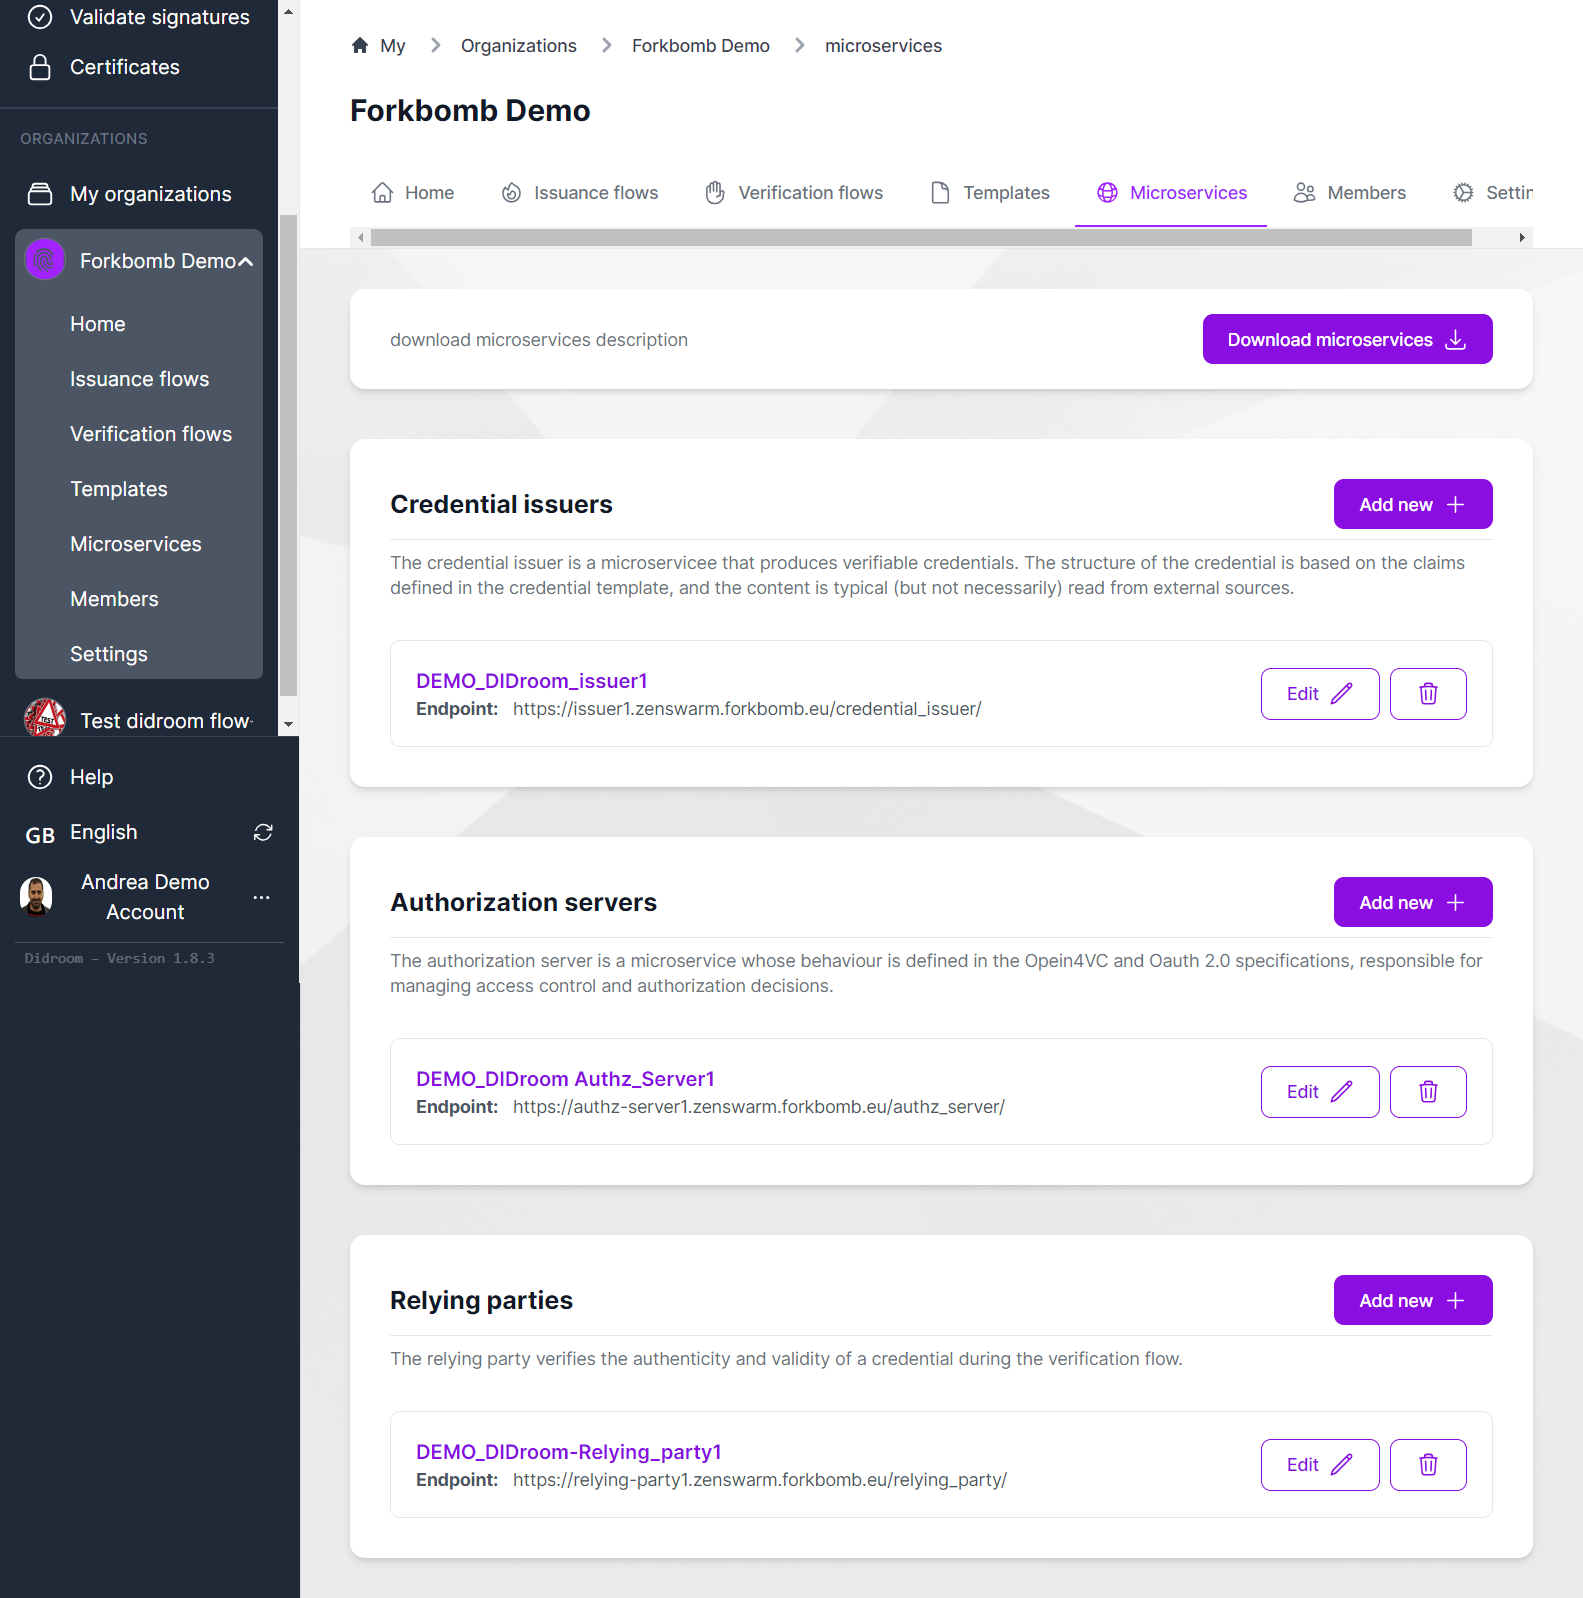
- Then From the Microservices page, click on "Download microservices"
- The Microservices page should look like this:
Download and deploy the Microservices
Copy the microservices.zip file on the server and unzip it, it should create multiple folders, one for each microservice you configured and used in the dashboard. Assuming that you have 3 microservices named my-issuer, my-authz, my-rp then do:
type:
cd  my-issuer
make up
And repeat this for each of the 3 microservices. The make up command generates the secret keys for the microservices, and registers a DID for each of them
From that moment, you should have the microservices (authz_server, credential_issuer and relying_party) configured and running, on the port you have configured in the dashboard.
Reverse proxy (with Caddy)
The OpenID4VCI and OpenID4VP protocols dictate the use of TLS, so you'll need to be able to access each microservice via https://
There are multiple ways to do this, using e.g. Nginx. We recommend using Caddy at least in test environments as it's easy and fast to configure.
Important:
While you configure and test Caddy, the microservices must all be running already, at the correct ports, because Caddy will try to bind the ports when it's started (or reloaded). So make sure you have the microservices running before you go into this section.
Install Caddy
To install Caddy check the documentation or try your luck with:
sudo apt update
sudo apt install caddy
Caddy config file
To edit Caddy config file, do :
sudo nano /etc/caddy/CaddyfileSetup Caddy with 3 subdomains
If you have 3 subdomains, assuming that the microservices are running on the ports 3001, 3002 and 3003, add to Caddyfile:
issuer.myapp.com {
        reverse_proxy http://localhost:3001
}
authz.myapp.com {
        reverse_proxy http://localhost:3002
}
rp.myapp.com {
        reverse_proxy http://localhost:3003
}
Setup Caddy with 1 domain
If you only have configured 1 domain, for example myapp.com then add to Caddyfile
myapp.com {
	reverse_proxy /credential_issuer/* :3001
	reverse_proxy /authz_server/* :3002
	reverse_proxy /relying_party/* :3003
}
Note:
Using a single domain for all the microservices, with this configuration, won't allow you to use the Swagger to test the microservices. The Swagger is available at the /docs route, configuring it's access is possible but more complicated.
Receive your first credential
After you have deployed your microservice, you are ready to receive your first verifiable credential!
- install the wallet on an android phone from here: https://github.com/ForkbombEu/wallet (you can scan the QR code on the github repo),
- create a user on the wallet (or log in with the user you created on dashboard.didroom.com)
- scan the QR code you see in the Issuance Flow page (alternatively, if you log in using the dashboard user, you should see your credential in the Home of the wallet)
- If everything worked well, you should see something like this in the wallet: